Learn how to configure your WooCommerce shop to send e-commerce events to the data layer. You can set up your e-commerce shop performance in Google Analytics or Looker Studio.
You’ve set up Google Analytics on your website to receive user behavior data and website events. Some of these events are understood correctly and are shown to you in GA4 reports. However, a lot more has to be configured for Google Analytics to understand website events.
For this, your website should send information on user activity in a bucket called the data layer.
Quick Recap on How Tracking Works
In this post, I’ll show you how to enable steps 1 and 2: Enable your website to send user activity information to the data layer.
When you finish the instructions here, your website should have the data layer enabled and information available for GTM to send to GA4.
ECommerce Events
Google recommends a few e-commerce events, and implementing those can help most of your tracking setup.
| Event | Trigger when a user… |
|---|---|
| add_payment_info | submits their payment information during checkout |
| add_shipping_info | submits their shipping information during checkout |
| add_to_cart | adds items to their shopping cart |
| add_to_wishlist | adds items to their wishlist |
| begin_checkout | begins checkout |
| purchase | completes a purchase |
| refund | receives a refund |
| remove_from_cart | removes items from their shopping cart |
| select_item | selects an item from a list of items or offerings |
| select_promotion | selects a promotion |
| view_cart | views their shopping cart |
| view_item | views an item |
| view_item_list | views a list of items or offerings |
| view_promotion | views a promotion on your website or app |
If you want to custom track, you can ask your developers to push custom events to the data layer for a particular user action and send the parameter name and value along with that event.
Another way to do this is using GTM4WP – a free WordPress plugin that enables the data layer object on your site and pushes event information to the data layer.
It sends all the Google-recommended events, and you must also send more information if you need more event information in your data layer.
Alternatively, you can use Datalayer for WooCommerce (Paid), Google Analytics for WooCommerce (Freemium), and other plugins to achieve the same effect.
The only option without using any plugins is pushing those events yourself, but after much research, I couldn’t find any tutorial to do that. For this reason, I’ve used GTM4WP as my core plugin to send data and create final reports for stakeholders of DD Farms.
How to Set up GTM4WP on Your WooCommerce Store
The setup for GTM4WP is simple and we’ll go over it together.
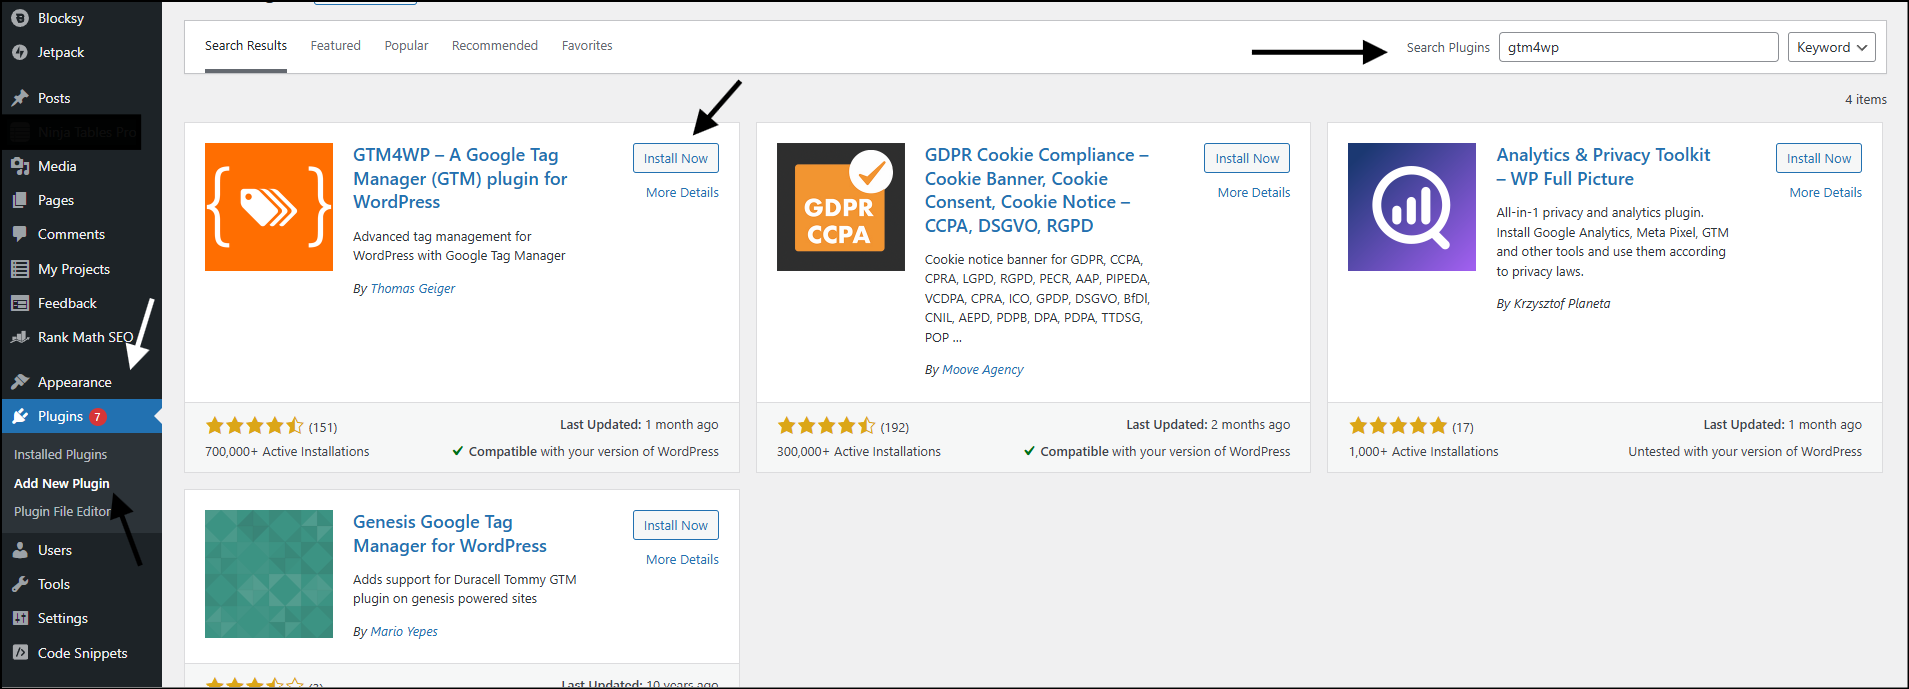
Step 1: Install the GTM4WP plugin on your website
- Go to Plugins
- Add new plugin
- Search GTM4WP.
- From the list, select GTM4WP and click “Install now”
- Wait for a few seconds, and now click “Activate”
After installing your plugin, let’s set it up to start pushing e-commerce data to the data layer.
Step 2: Configure GTM4WP to Push ECommerce Data to the Data Layer
After installing the plugin, you can find GTM4WP under settings -> Google Tag Manager.
You’ll be taken to the plugin’s settings page.
Let’s review the most important tabs you’ll use for tracking. You can leave the other tabs as they are or configure them based on the metrics you want to add in your final report.
General Tab
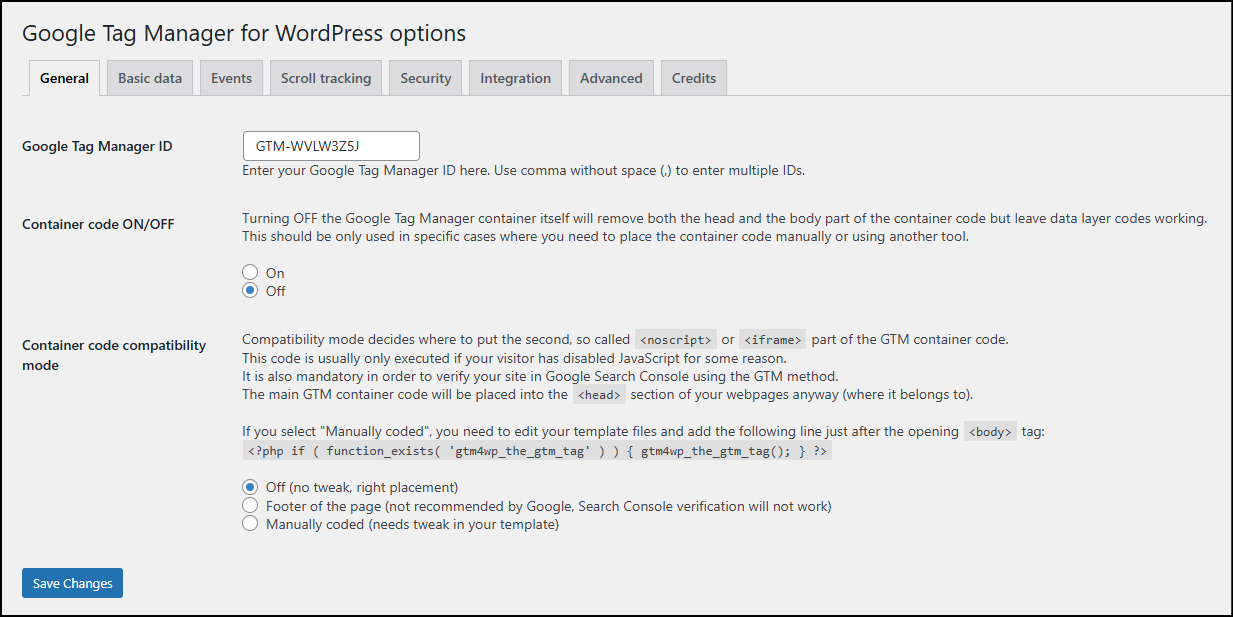
You can put your container code, which you can get from your GTM screen, in the Google Tag Manager ID.

Container code – I keep this off since I’ve already set up my Google Tag Manager using WP Code. If you don’t want to do that, you can select the “on” option.
Container code compatibility – for most cases, you can keep this off.
Integration Tab (WooCommerce)
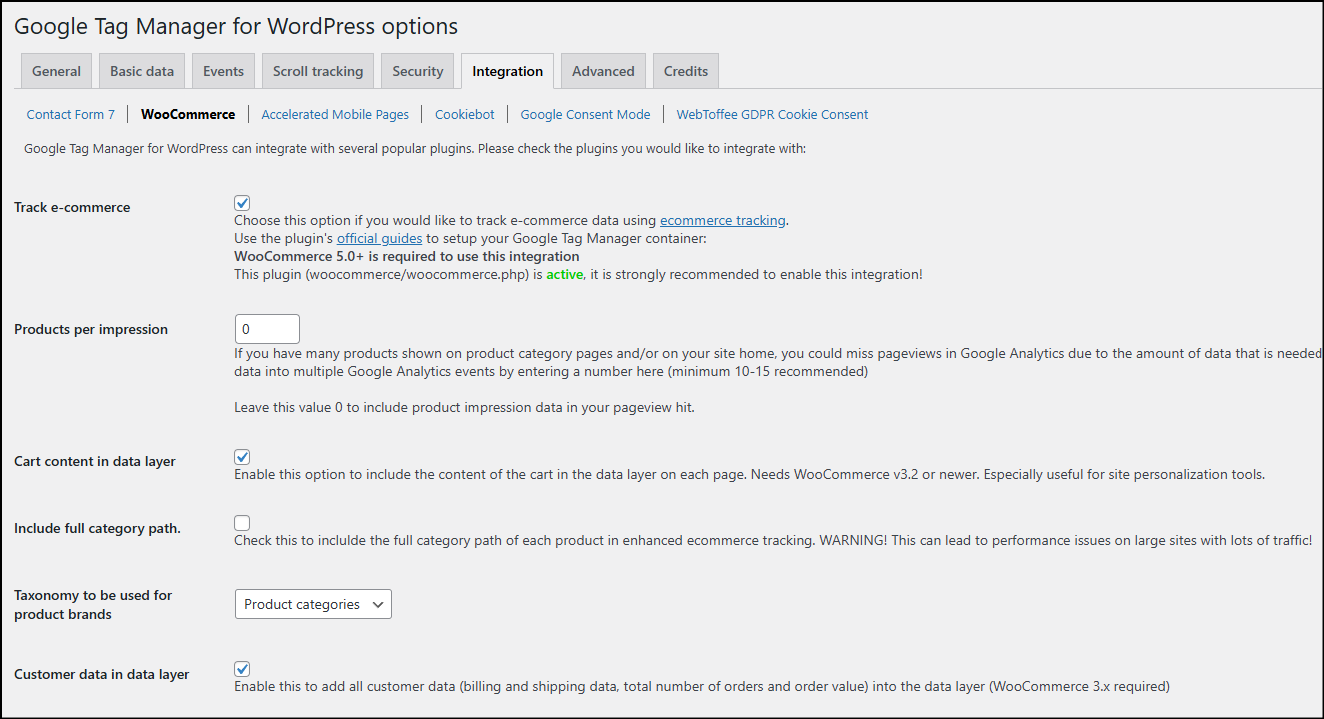
From the list, turn on the following options:
Track e-commerce—Tick this option. This will help your website send information to the Data layer, which can then be picked up by GTM and ultimately sent to GA4.
Cart content in the data layer – You can use this to fire an event whenever a cart contains a particular product.
Customer data in the data layer—We can use this to get customer email addresses and total order values. We can then use this to find the most revenue-generating customers or calculate their lifetime value.
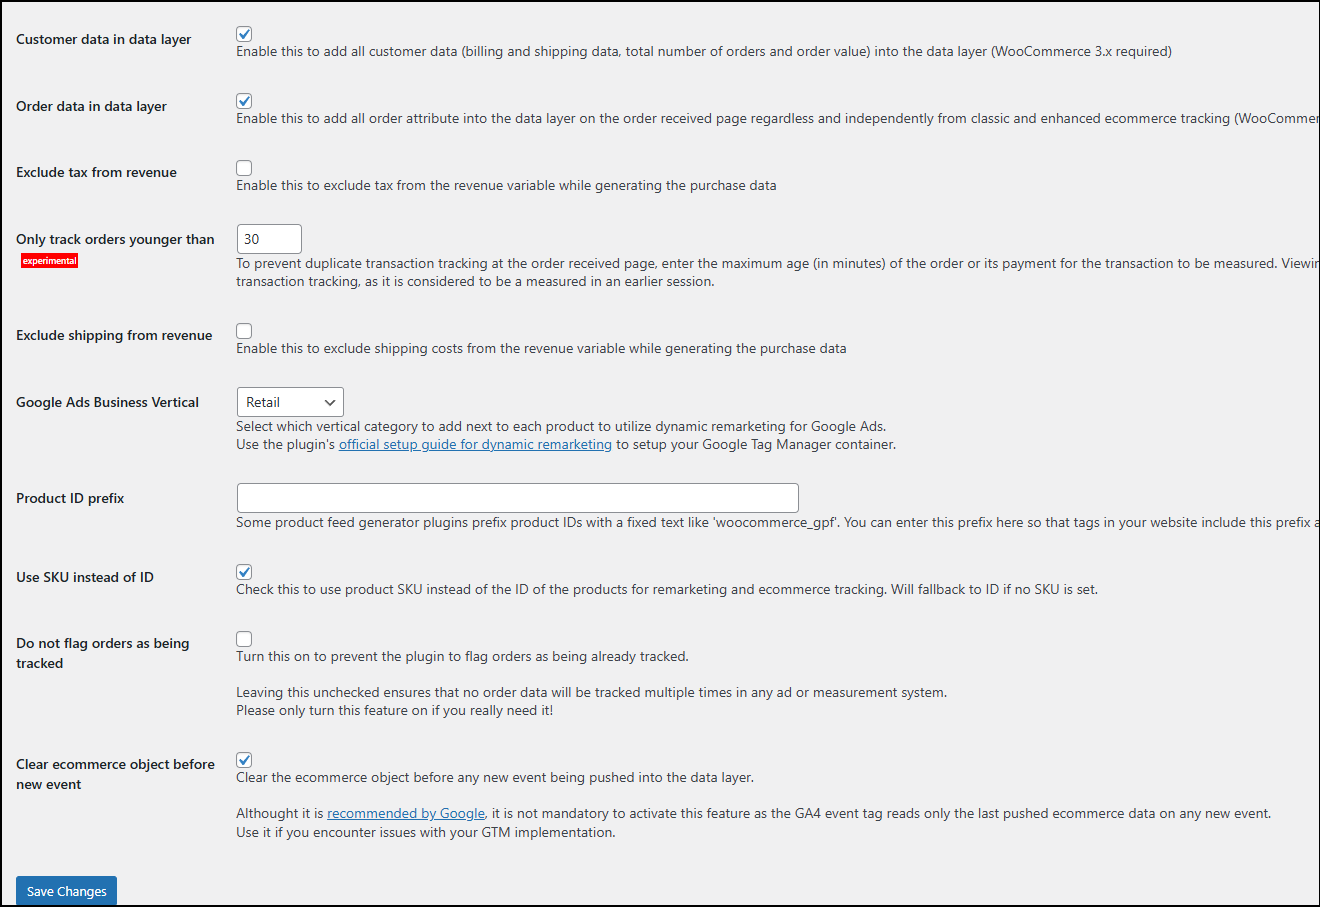
Order data in the data layer – Turn this on to see more data with every order, which you can use further in your events as parameters.
Use SKU instead of ID – Every product has its unique ID in woocommerce. Use this option to track SKUs instead.
Clear e-commerce object before the new event – Optional, but I will keep it on.
Thats it! You’ve turned on most of what you need in GTM4WP, and now you can expect to see the event push to the data layer from your WooCommerce store.
Step 3: Test if ECommerce Events are Being Pushed to the Data Layer
Now that you’ve configured your WordPress plugins to send e-commerce data. Let’s see if they are being sent to the data layer.
There are many ways to test. My first preference is always Google Tag Manager preview mode.
If you’re using a site without access to GTM or you’re auditing a competitor’s site for data layer event pushes, you can use Chrome plugins to see the events.
You can use Google Analytics debugger to see the events being sent in the console. Use the Chrome dev tools to navigate to the console. Refresh the page and you will see event activity in the console.
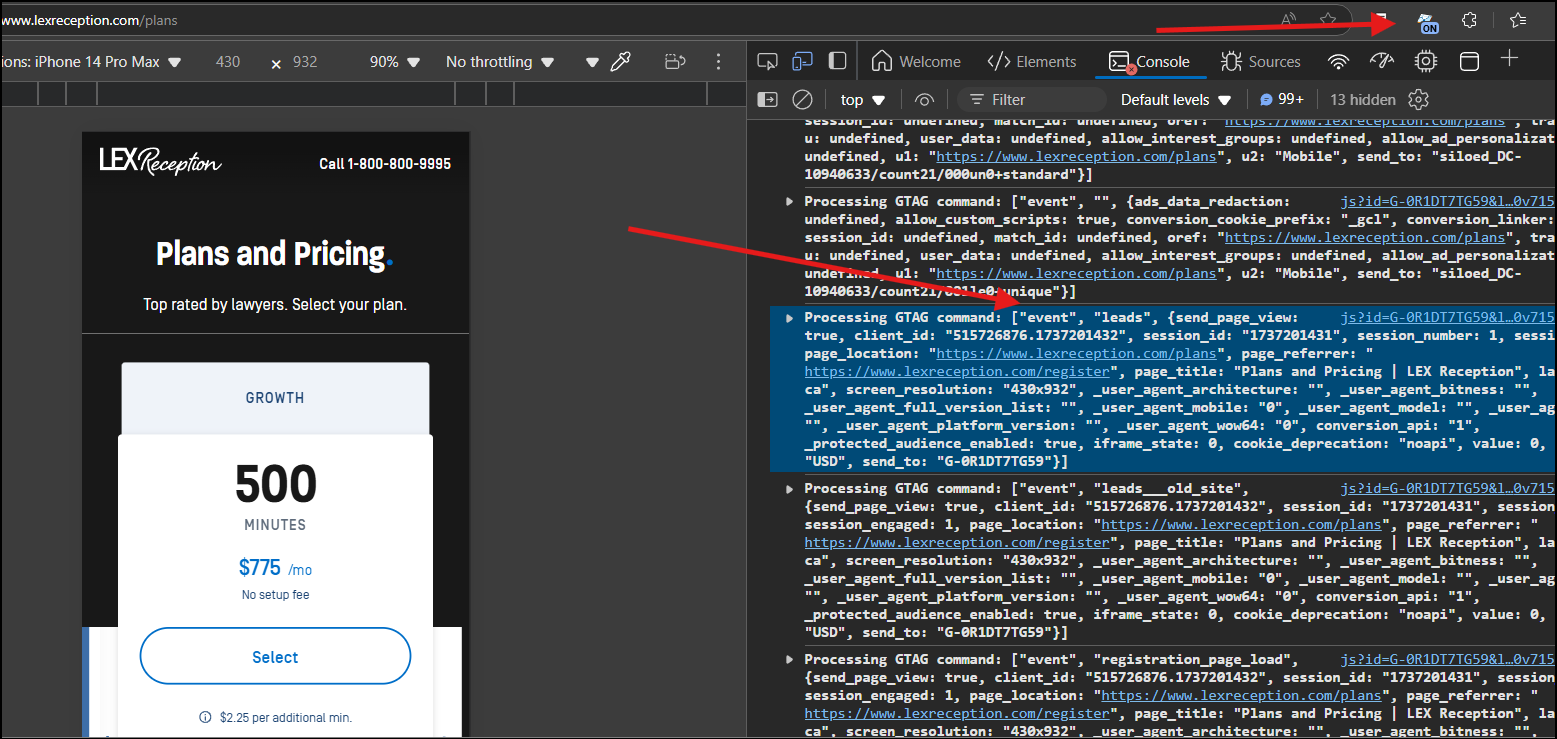
It is not as intuitive as the preview mode but it helps you get a sense of the events being pushed.
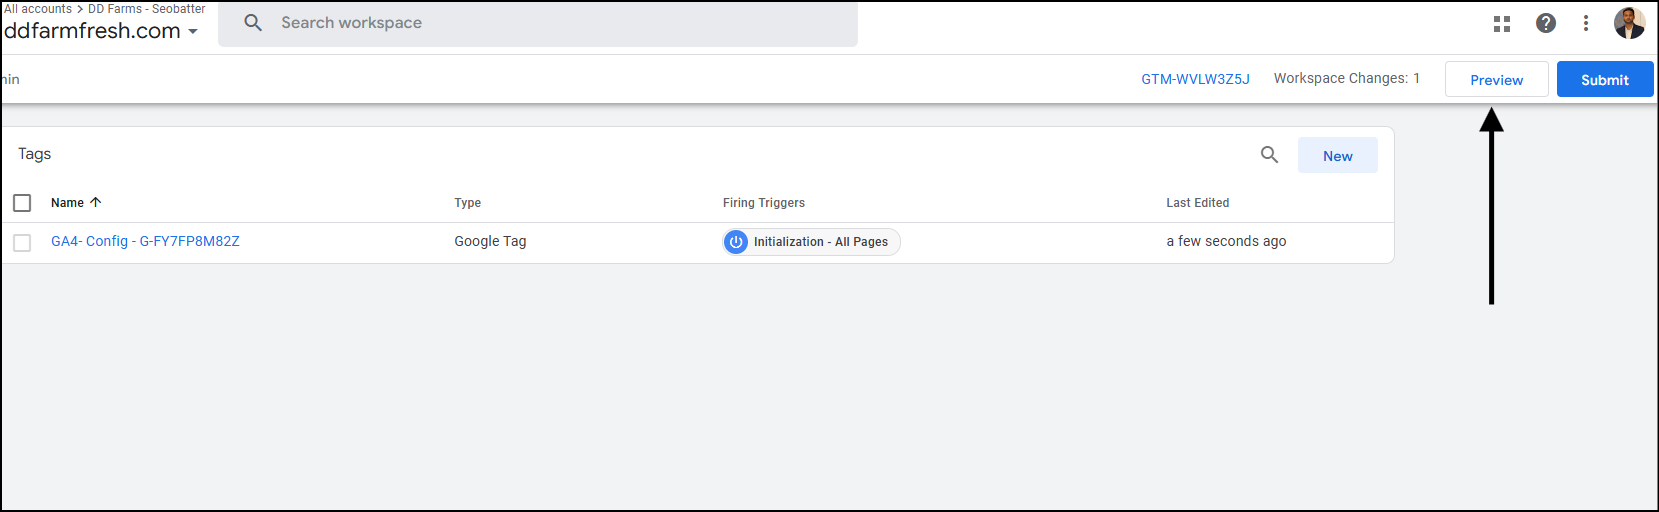
To use GTM preview mode, go to your Google Tag Manager account and select Preview.
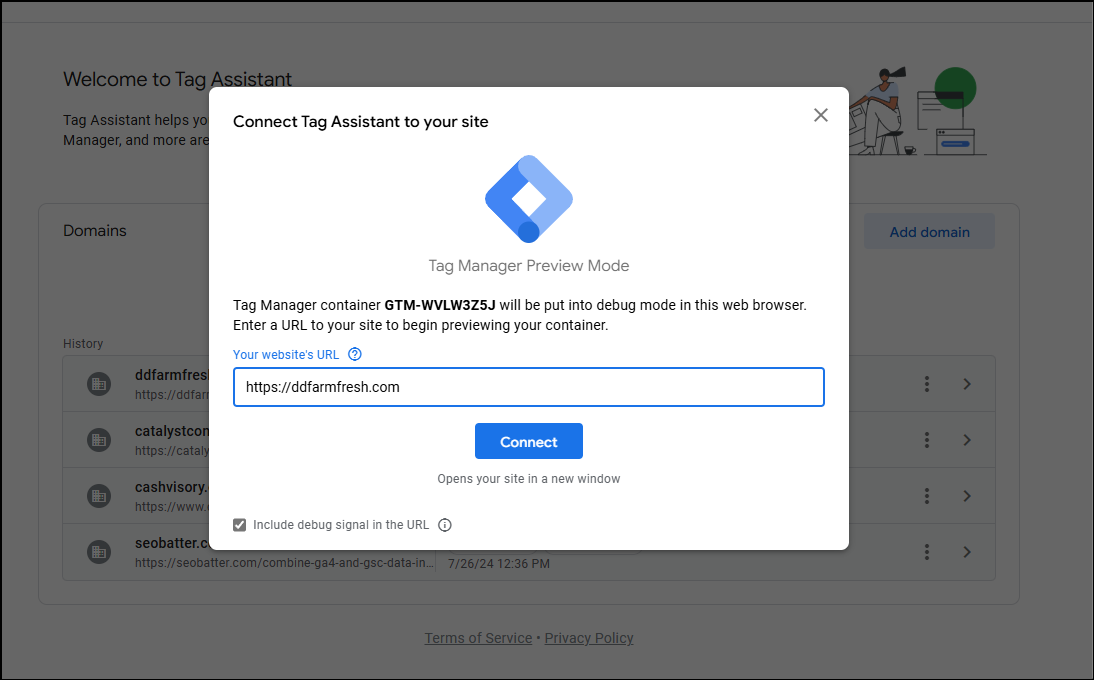
In the tag assistant tab that opens, enter your website (the one where you connected that GTM account). Hit Connect.
After you hit connect, you’ll see a new window opening your website or a new tab.
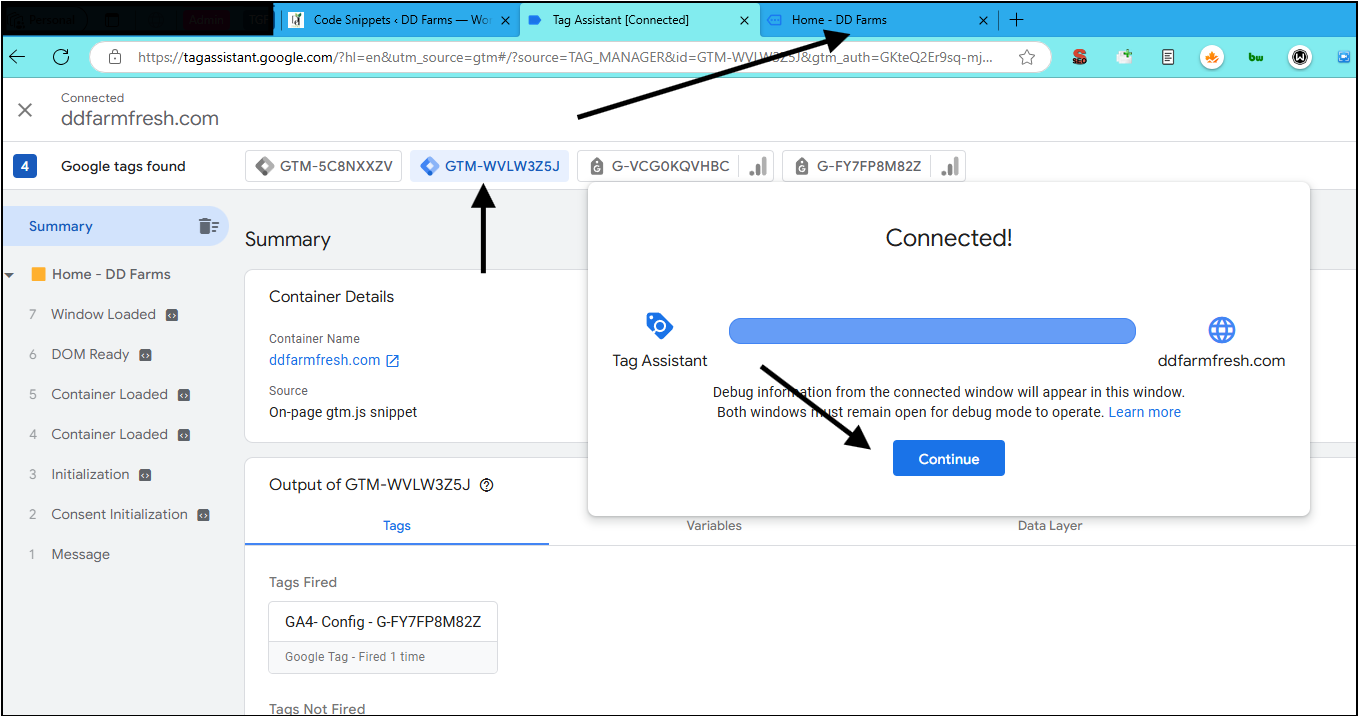
Tip: Make sure your adblockers are off. Sometimes, VPN or other extensions also block ads and tracking scripts, so allow them to see the connection.
Now click continue, and head to the tab where your website is open.
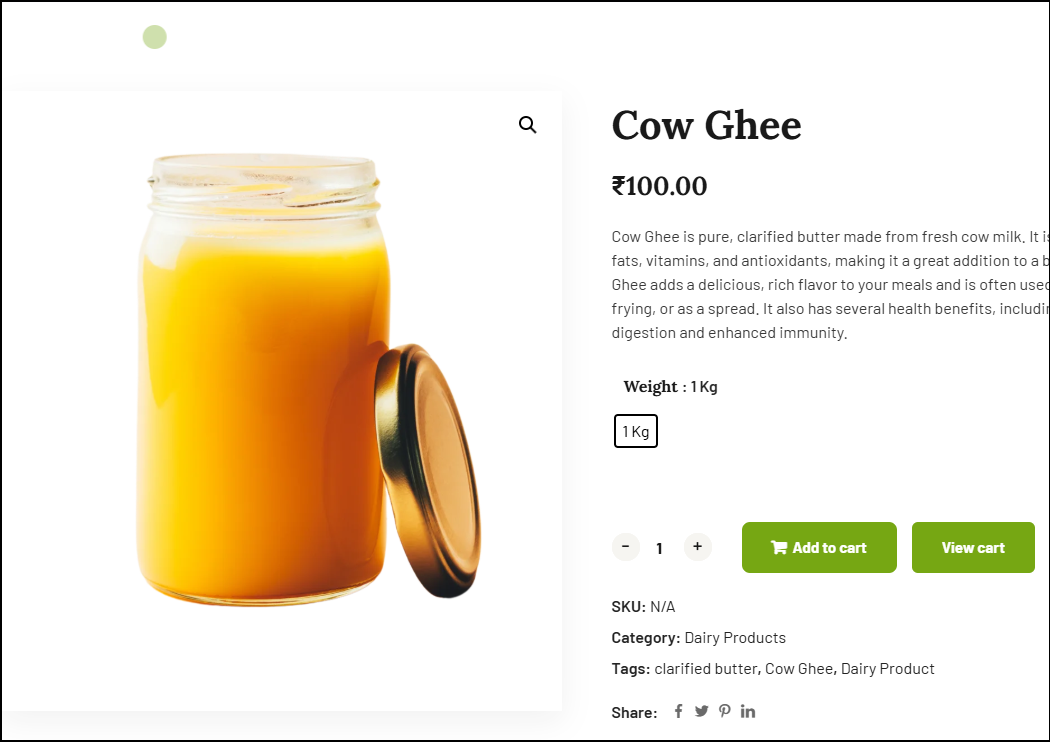
Do a few actions on your site, such as adding a product to the cart.
Head back over to the tag assistant tab. In the left sidebar, you should see the event “add_to_cart.” Click on the data layer tab to inspect the data layer values.
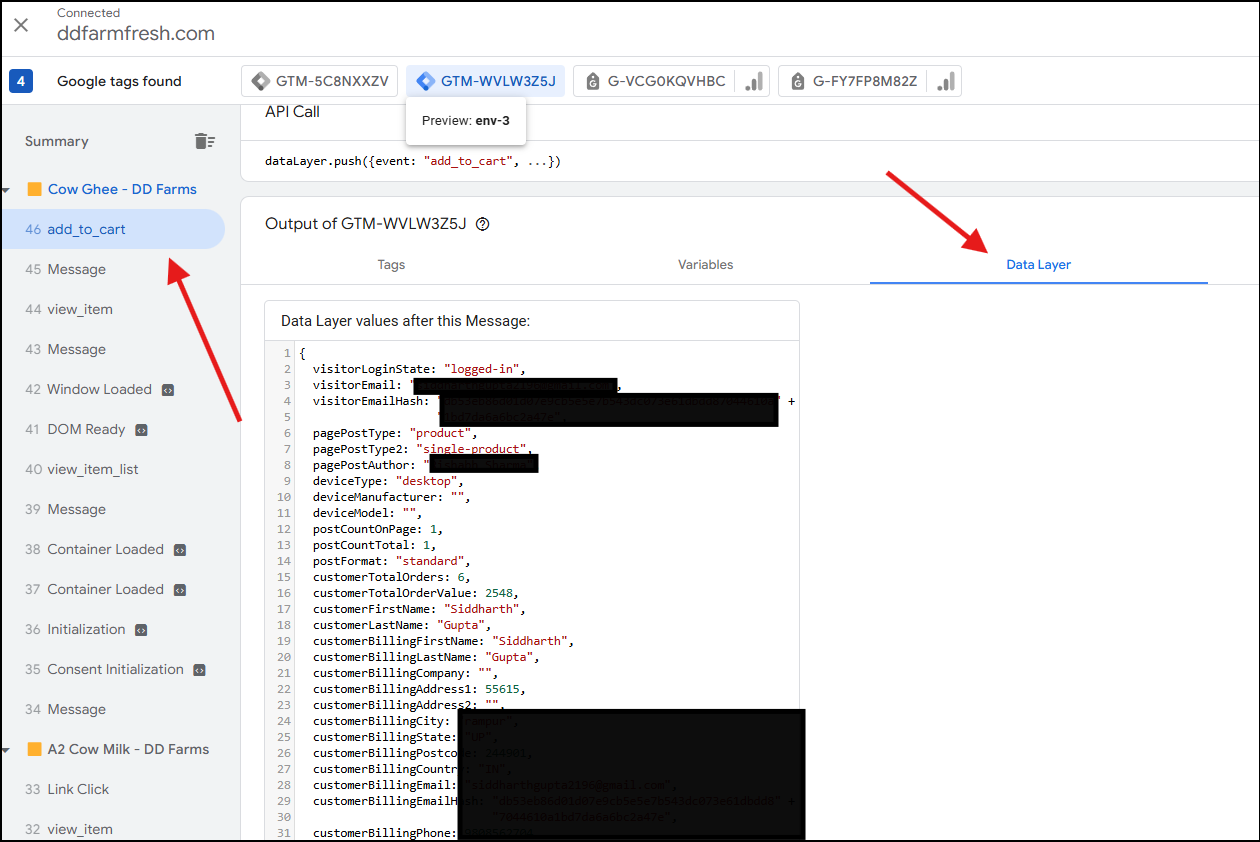
You might notice some different code/ information in your data layer. It’s because, in GTM4WP, I enabled other options, such as log visitor state. But the important thing for you to notice is the “add_to_cart” event in the sidebar.
GTM reads this from the data layer, which would also have “add_to_cart” mentioned as an event. Moreover, you’ll also see eCommerce data being pushed along with the event.
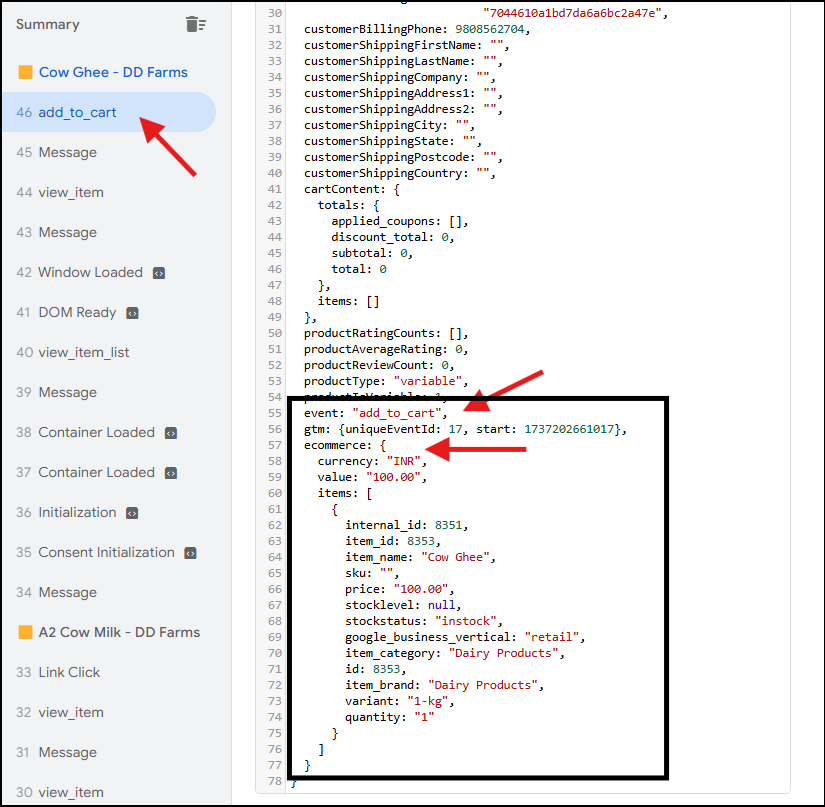
This verifies that your WooCommerce site pushes e-commerce events to the data layer.
You can now use this information to set up tags in Google Tag Manager and send that information to Google Analytics.
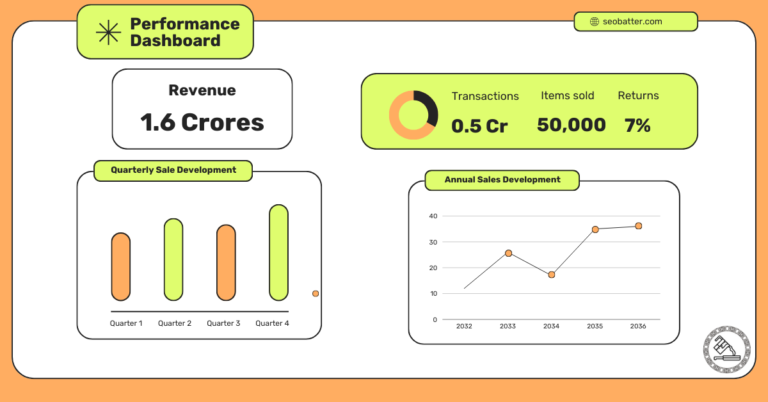
How you use the information in Google Analytics is up to you. But a good way to do it is to is to use Looker studio reports and create a dashboard for measuring your WooCommerce shop performance.
Next Steps
Previous in the series: How to Setup WooCommerce Website with GA4 and GTM
Next: Set Up ECommerce Events in GTM for Your WooCommerce Shop
Also Read: Tracking WooCommerce Shop Performance using GA4, GTM and eCommerce Events