Struggling to add Google Analytics and e-commerce tracking to your WooCommerce site?
In this post, I’ll show you how to add Google Tag Manager and Google Analytics and push eCommerce Events to your WooCommerce and WordPress websites.
This guide is divided into three sections:
- Connect Google Tag Manager to your website
- Set up Google Analytics on your website
- Setting up your WooCommerce site to push e-commerce events
Connecting Google Tag Manager to Your WooCommerce Store
Google Tag Manager allows code to be pushed to a destination based on the conditions (triggers) you define. We need Google Tag Manager on your shop to:
- Collect data from your website
- Send data to Google Analytics
Step 1: Create a Google Tag Manager Account
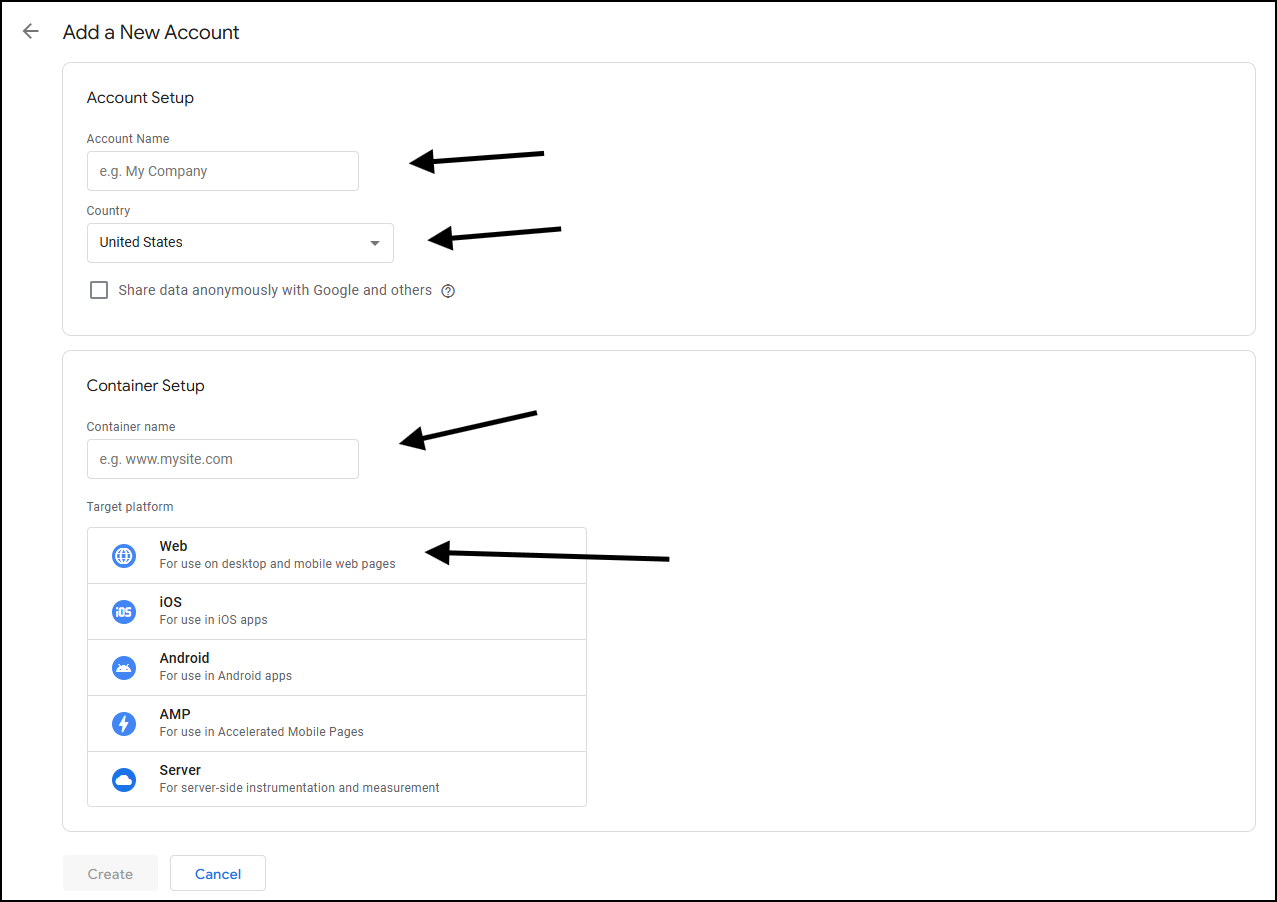
Go to “https://tagmanager.google.com/” and create a new account.
- Add your company name in the account name field.
- Select your country.
- Under container setup – Enter your website name.
- Select Web as the target platform for the container.
Please accept the terms of service agreement if you agree with it and the data process terms by checking the box at the bottom and selecting yes.
Your new account will be created, and you will be shown a code snippet, which will be placed on your website.
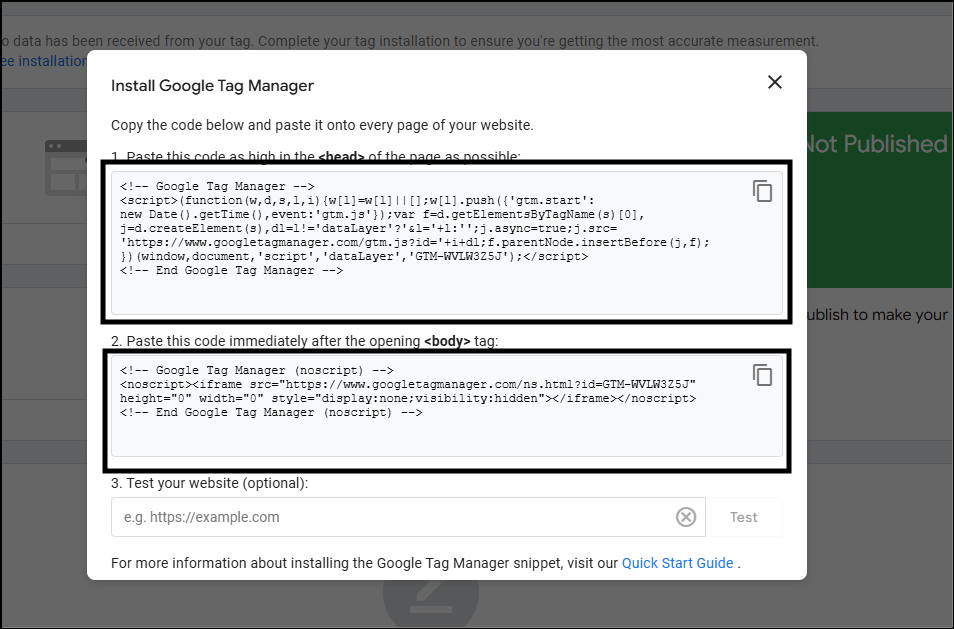
Keep this snippet with you. After using a free plugin on your site, we will use this code for the head and body sections.
Step 2: Use WPCode (or Similar) to place GTM code on your WooCommerce site
Install WP Code (free) using the plugin section on your site. This would help us place the GTM code on the header and body sections of all pages on your site.
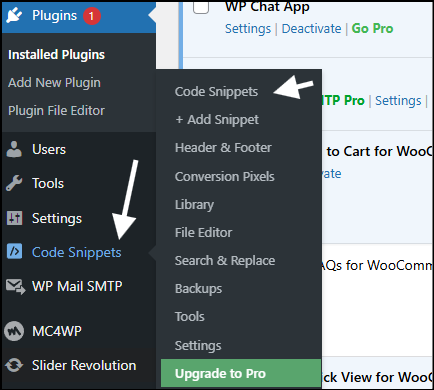
After you’ve installed WPCode, find “Code Snippets” from your left sidebar. If it’s not there after you’ve pressed activate, refresh your page to see it.
When you hover over to code snippets, you’ll see Code Snippets again as an option. Select it to see all the snippets.
Step 2.1 Add Google Tag Manager’s Code in the Sitewide Head
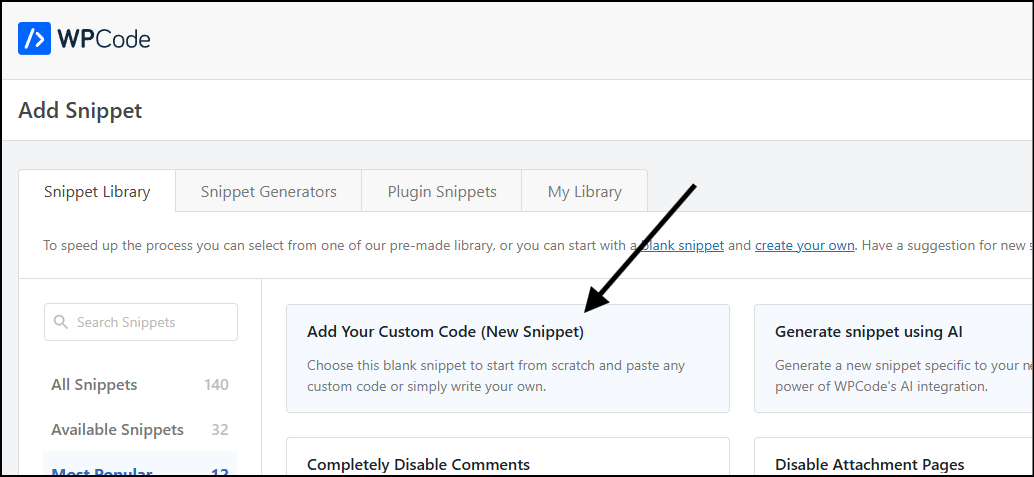
- Start by selecting “Add New.”

- Select “Add your custom code (New snippet)” on the next screen.
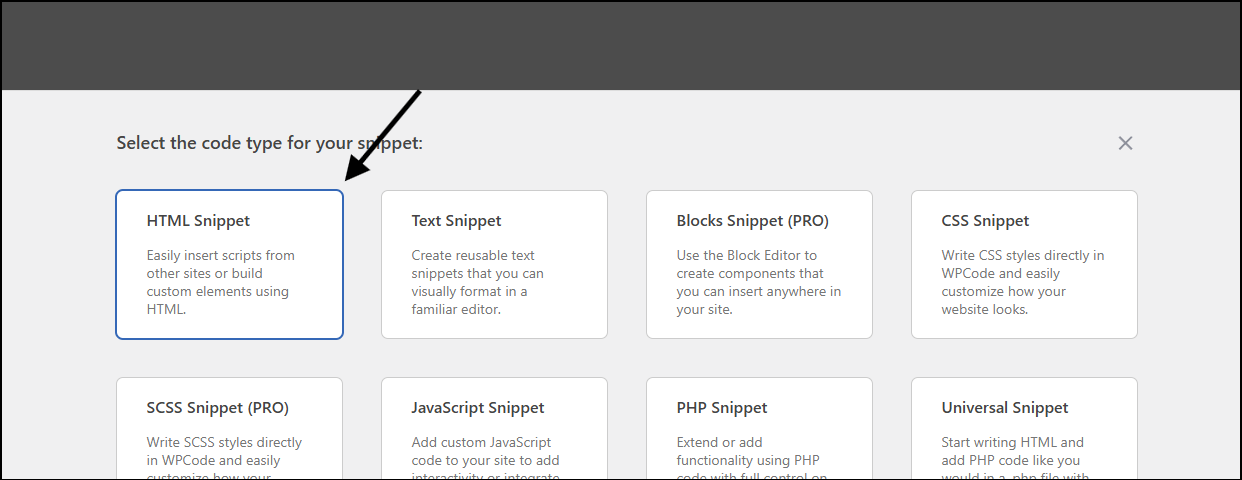
- On the following prompt, select HTML snippet.
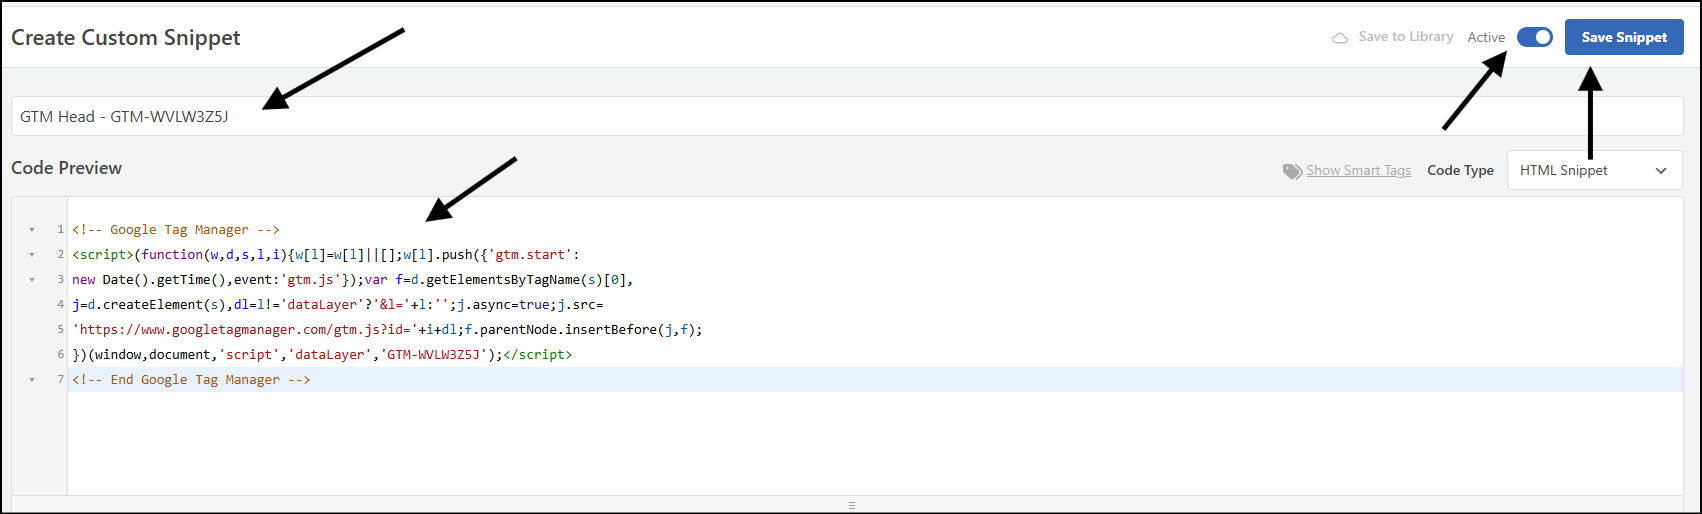
- Add a descriptive title, such as
GTM Head - GTM-WVLW3Z5J - Paste the code that you got in while creating a new GTM account. Use the first snippet.
- Turn the toggle on the top left – from inactive to active.
- Select save snippet.
Step 2.2 Add the GTM installation Code in the Sitewide Body
- Select code snippets from the left sidebar again.
- Start by selecting “Add New”.
- Select “Add your custom code (New snippet)” on the next screen.
- On the following prompt, select HTML snippet.
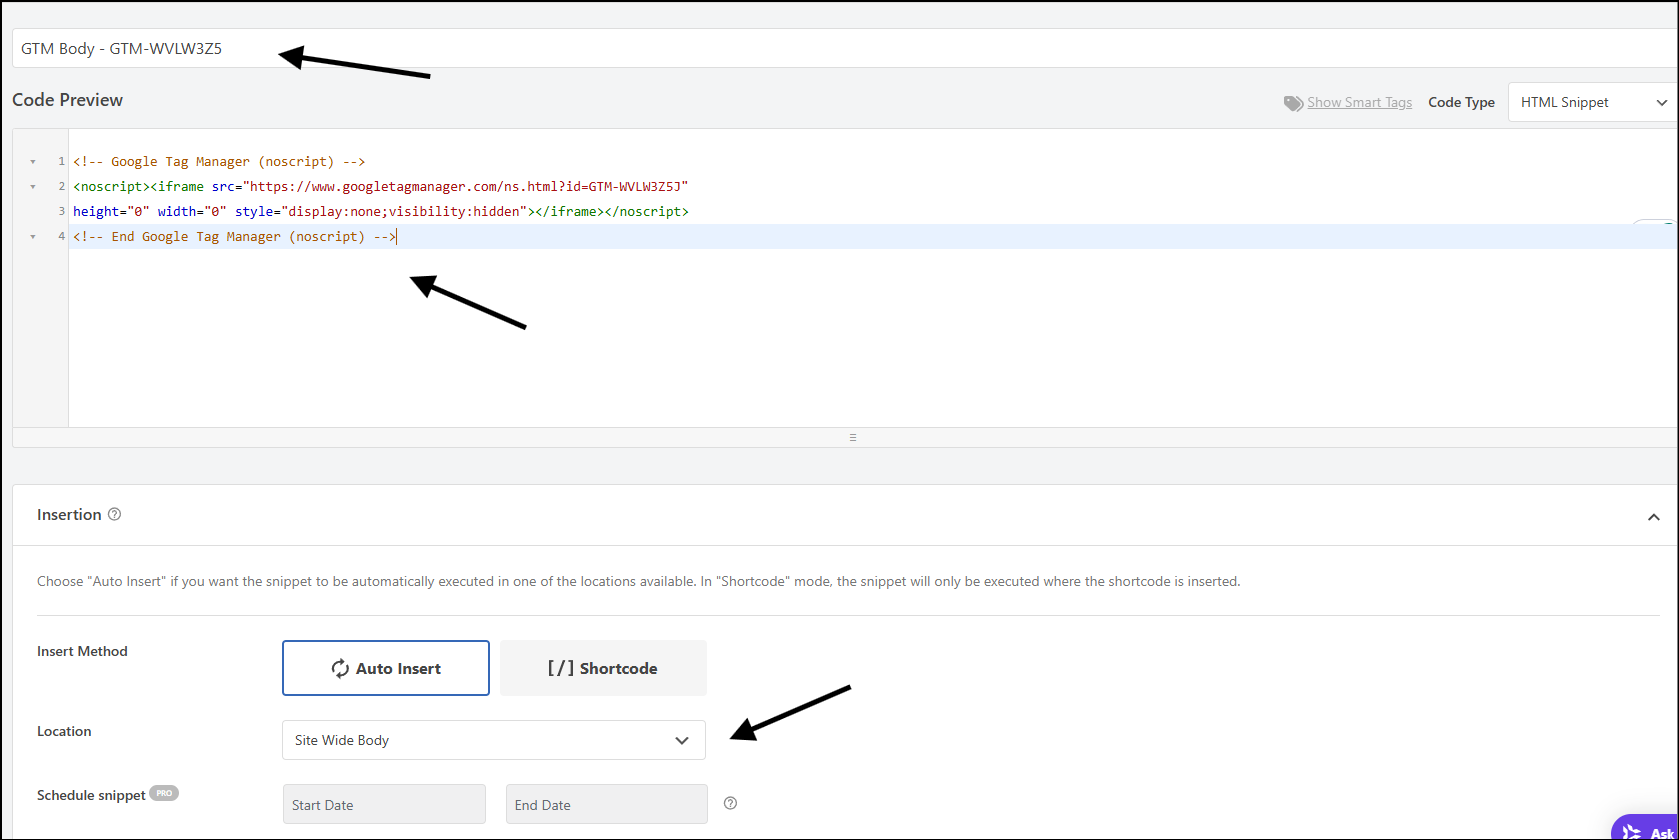
- Add a descriptive title, such as
GTM Body - GTM-WVLW3Z5J - Paste the code that you used while creating a new GTM account. Use the second snippet.
- Under the insertion section, select the location as the sitewide body.
- Turn the toggle on the top left – from inactive to active.
- Select save snippet.
Can one website have two tag manager accounts?
Yes, your website can have two tag manager containers. It is advisable to use one, but if you want to use two, you can do that for simple GA4 event tags and other marketing tags.
How do I delete my tag manager account?
Go to tag manager home – https://tagmanager.google.com/#/home
From the account, select three dots on the top right and select Account Settings.
On the next page, you’ll again see three dots. Use those three dots to click and select “delete”.
I lost my GTM installation code, how do I see it again?

Go to tag manager and the account you want to see the code, click on your GTM ID. You’ll see the exact installation instructions again.
Set up Google Analytics in Your WooCommerce Store
Now that you’ve installed GTM on your website, we’ll use it further to set up Google Analytics on your WooCommerce store.
Because GTM can fire tags (push data to a destination), we use it to push website data to Google Analytics.
Step 1: Create a Google Analytics Account
Use the video from Google to create a new property.
Use the Google Analytics official link to create a free account.
After creating a new account, use the data collection tab to select Web data stream.
Enter your site URL and select a stream name.
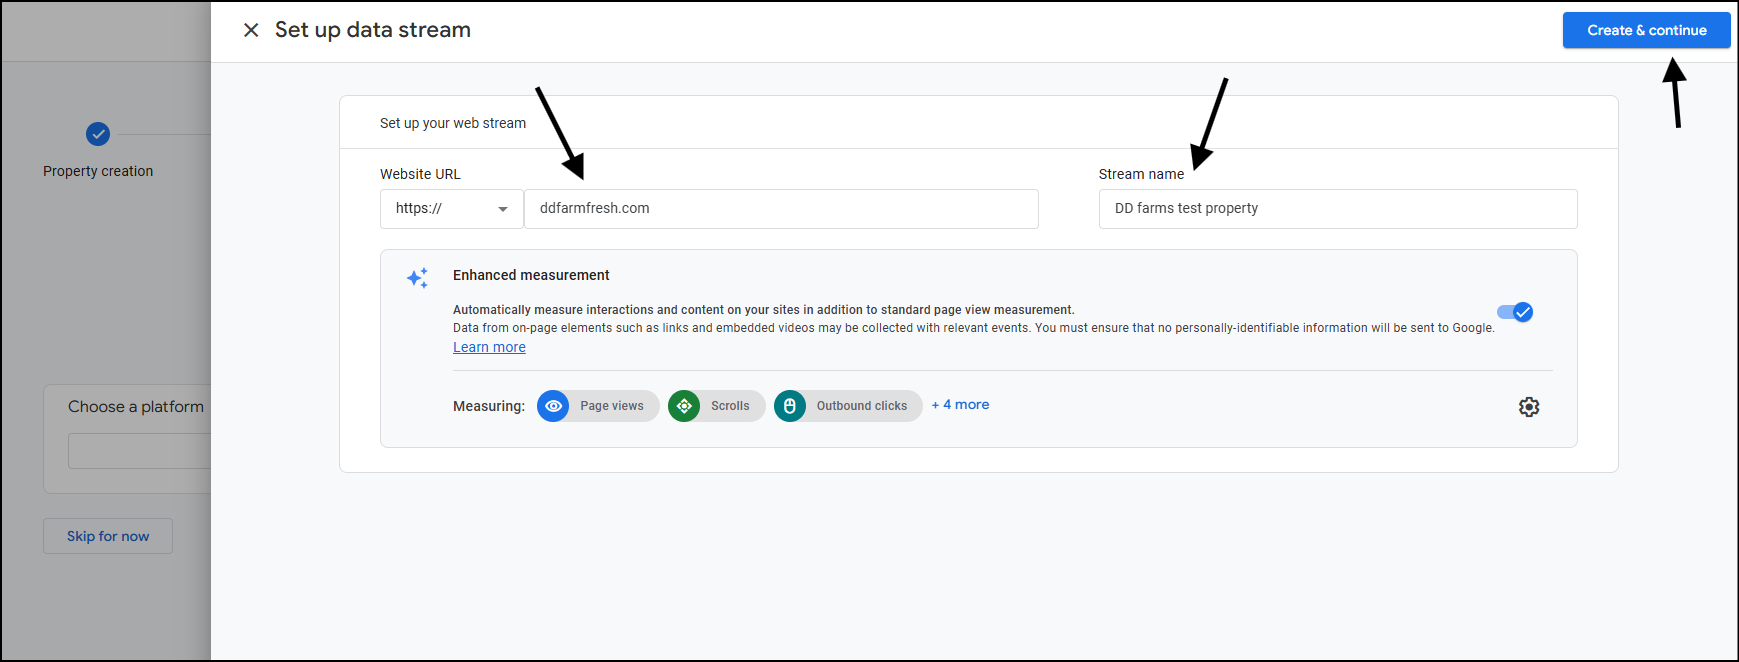
Wait for a few seconds to see your property created. A new screen will automatically come up.
You’ll see three options: Install with WordPress, Install manually, and Use a Google tag you already have.
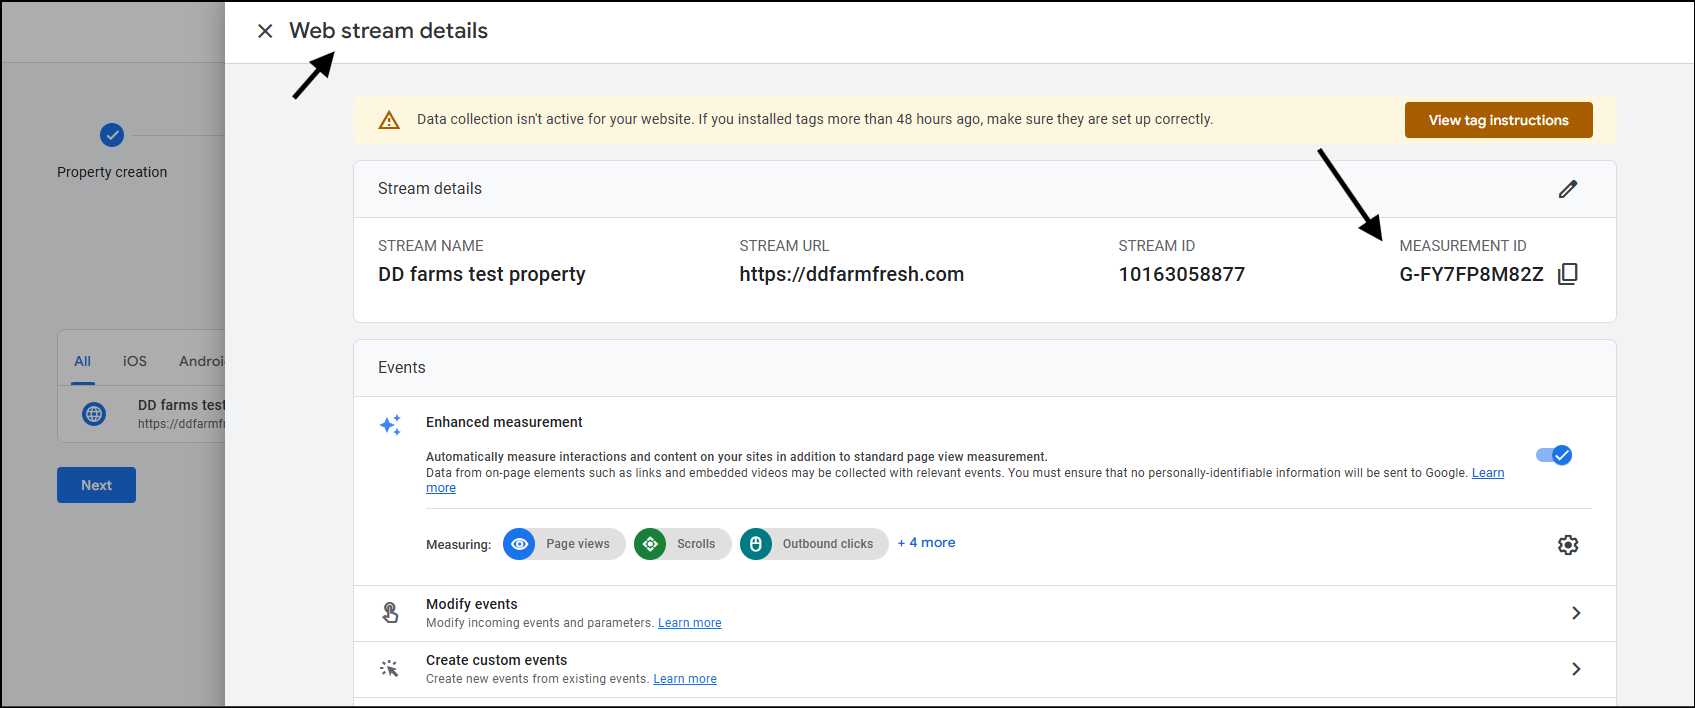
Rather than selecting anything here, close this section.
When you close, you’ll see your “Web Stream Details”. Copy the measurement ID from here.
Step 2: Set up Google Analytics using GTM
We’ll use the Google Tag Manager account you created to connect Google Analytics to your website.
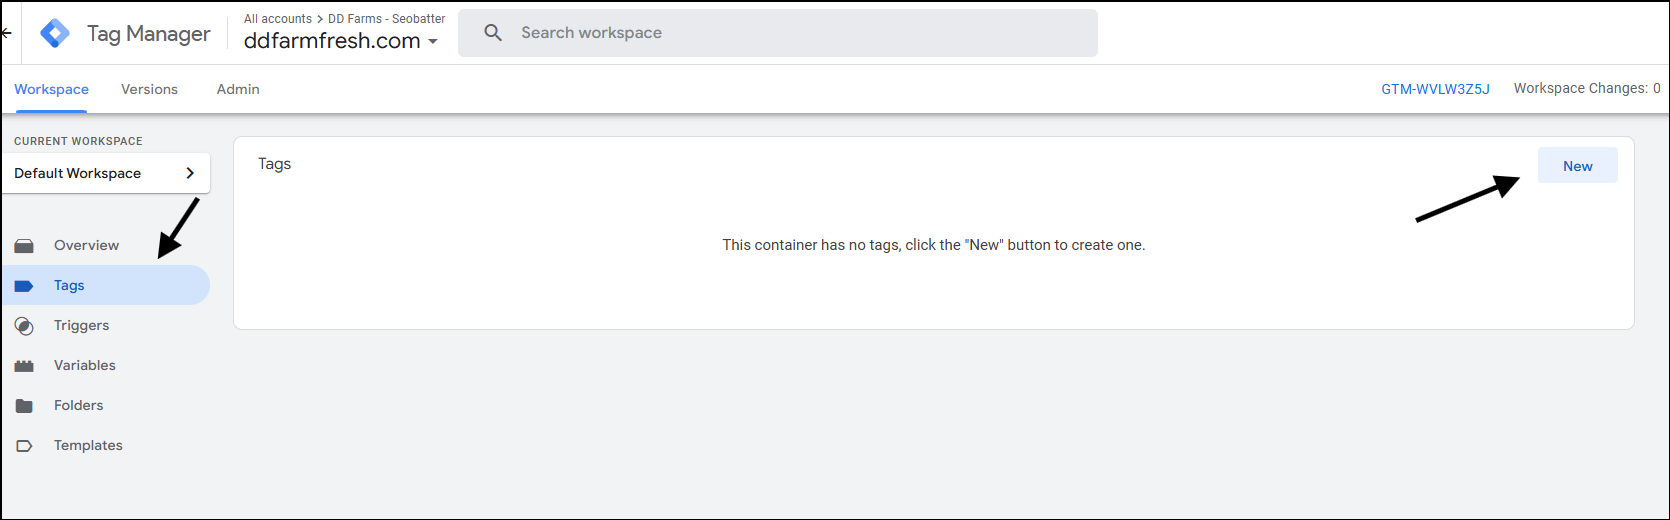
For this, open your GTM account and head to the Tags section from the left sidebar. Click on “New” to create a new tag.
You’ll see a new section –
- Enter the name of the tag. I generally keep it as such:
GA4 - Config - Measurement ID. So, for this property, my tag name isGA4 - Config - G-FY7FP8M82Z. - Click on the tag configuration section to open a new list of tags. Select Google Analytics, and select the “Google Tag” from there.
- You’ll see an option to enter your Tag ID from there. Enter the measurement ID you copied before creating your Google Analytics property.
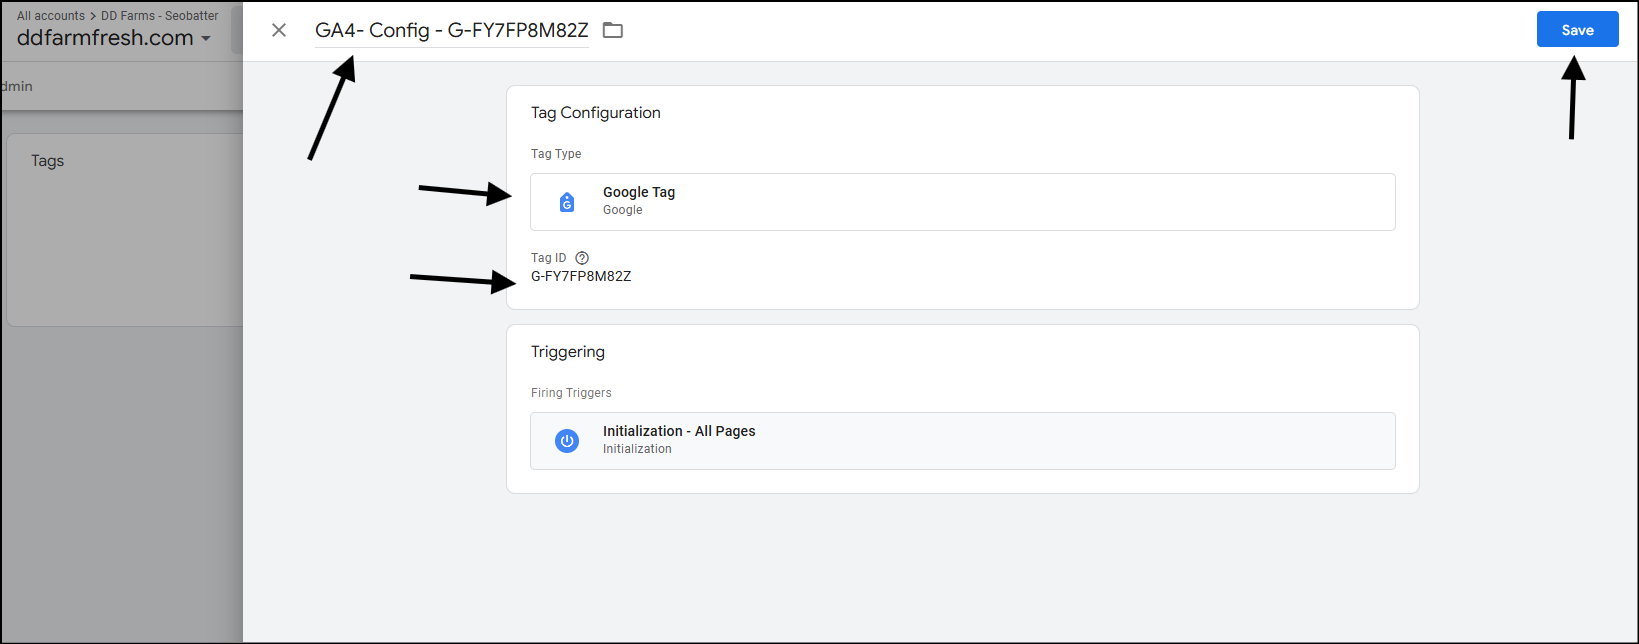
The trigger will automatically be set for you. If not, you can select the All Pages view or initialization—all pages and click save.
- Click on save, and your tag will be saved.
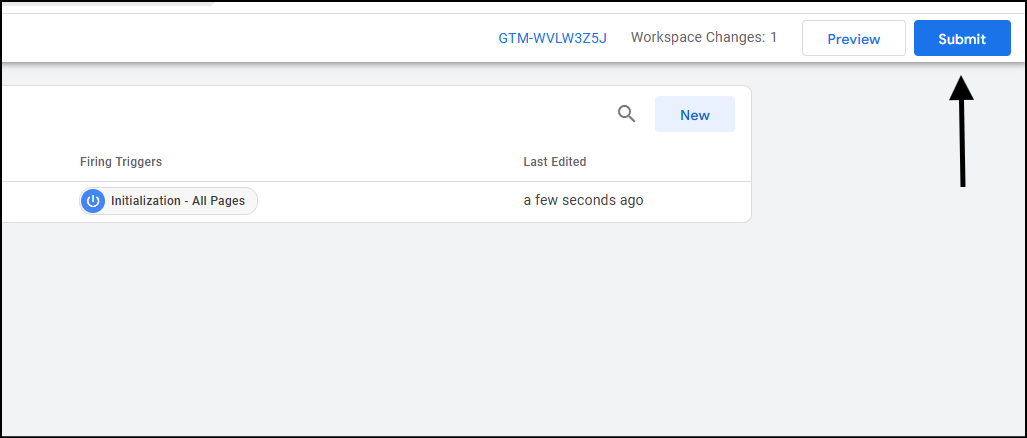
- After you’re taken to the tag section of the GTM again, press submit.
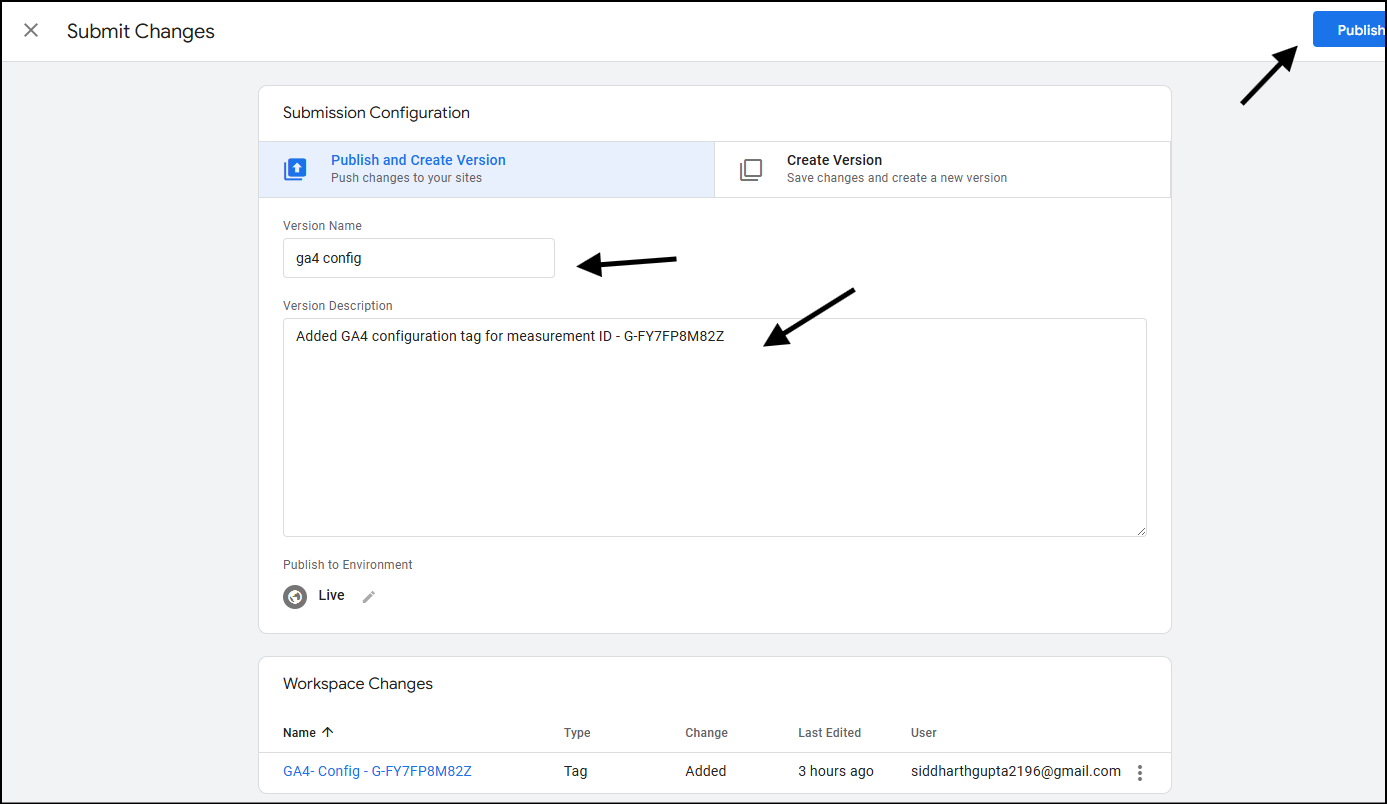
- Give your version a description name and add a description explaining what you’ve done in GTM. Hit Publish to save your changes.
Thats it! You’ve now connected Google Analytics to your WooCommerce website.
Next Steps
Next: Configure your WooCommerce Store to Send ECommerce Events to the Data Layer
Also Read: Tracking WooCommerce Shop Performance using GA4, GTM and eCommerce Events